Image Map

Wednesday, September 21, 2011

What's In My Bag Linky Party

It wasn't until my third year of teaching when I finally invested in a Teacher Bag. *I know right?* I was so tired of all of my bags falling apart into a shredded mess of pieces! I'm pretty sure that was a sign that I needed to stop lugging teacher junk home… however, I just took it as a sign to go shopping for a bag that could handle this problem. 

So, last year I bought this lil' number. And I love her.
 
I purchased her online from LL Bean and chose to monogram it. I love the material, it's so sturdy, it can handle it all. However, it has left bruises on my poor lil' arms from that problem mentioned early. Punishment? Sometimes I pack it to the top with teacher things which I can barely carry. Why do I do this? Not sure. Most of the items never get touched.

Exhibit A: The pile of stuff I cleared out of my bag on Monday. What it is, I'm not sure… I guess I'll sort through it one day. I'm sure I will be searching for something soon and it will be located in this pile. Oh well. 
Items that are currently in my bag: planner, notebook, binder for my grades, lessons, etc.
Clipboard with our current Units of Exploration Topic: Ocean Animals, my new read, and random cut outs that I didn't know were in there?
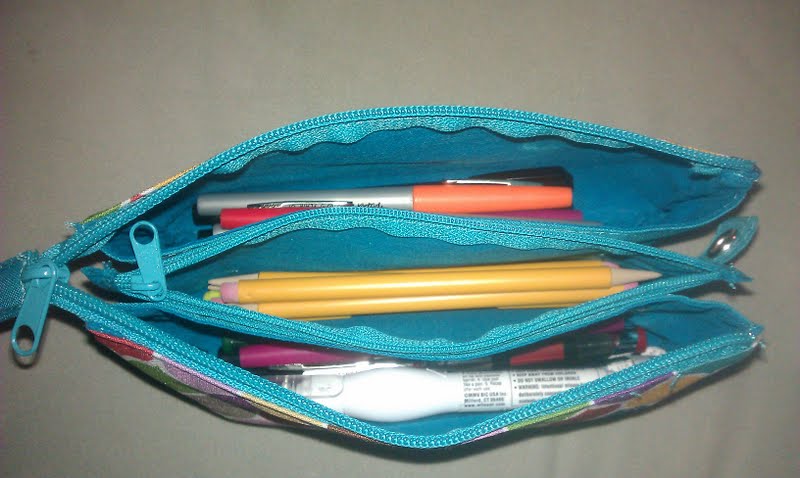
Pen Pouch, Calculator, Crayons…. the necessities. 

 As far as my teacher purse goes… I recently had to take reduce the size of this lover. I love my red Chanel but it was TOO much to carry with the teacher bag. Plus, I could NEVER EVER EVER find my keys. It was seriously annoying. So I started using the brown Chanel. 
I love looking inside people's purses but I won't torture you with mine. Its a mess! I carry my life in those purses. 
Hope you link up with The Inspired Apple so I can snoop inside your teacher bags! 
Pin It

Thursday, September 15, 2011

Anchor Charts...

I had a question today about introducing anchor charts to students. So I will tell you a little about how I typically introduce mine,  how we use them in our classroom, and how I decide which anchor charts to create.  My anchor charts are always based upon the skills I am teaching for the week or an important topic that we use daily (rules, morning routine, what is a good listener, etc). This week for example I am teaching about the phonics skill short /a/ and character and setting. Therefore, I created an anchor chart to go with each of these topics. 

How to introduce the Anchor Chart?
I like to create my anchor charts that involve our skills of the week with my students… therefore, I always do my "sloppy copy" with them.  That way the students are involved in the process of brainstorming what will go on the anchor chart. I like to guide this brainstorming process however, the students think they are in charge of this process. Then I take that "sloppy copy" (which means my messy quick handwriting and pictures) and recreate it on my own time into a neat and pretty anchor chart. The following day I reintroduce it to my students and we review what we talked about the day before. 

During the rest of the school year I tend to leave a lot of my important anchor charts up in various parts of the room! These are the ones that we constantly need to be reminded of. This is helpful when we need a reminder of this particular topic, we can just refer back to the anchor chart!

Anchor charts are also great for modeling neat handwriting, modeling your standards of great work, and AWESOME for a print rich environment!

Here is the current Anchor Chart I introduced today about IPICK! These type of anchor charts I always create before since the students do not brainstorm ideas to help create the poster. We then all together go over and discuss each part of the chart! 


*Thanks Cara for the inspiration of my chart!

Here is some others I have posted in previous posts...


Hope this helps!

Pin It

Wednesday, September 14, 2011

More Work Station Pictures...

Since I was pretty busy monitoring my students during their first round of Work Stations yesterday (some littles have problem with remember the "I Can" list, you know those kids). Like I promised in the post yesterday, I took some more pictures today! 

Word Wall Work Station
As of now students can either fill out their mini word walls or use the fancy pointer to point and read to words.  The mini word walls will go into a page protector and place in their work station folders. Students will be able to add to this as we add to the wall throughout the year. Eventually, students will have different activities to complete with the words on the wall.  

Students filling out their mini word walls. 

Poetry Station
Students can copy the large poem displayed, copy a poem from the poetry binder (which is not yet placed in the workstation), highlight rhyming words, illustrate the poem they copied, and read poems. I love to watch their Poetry Journals grow as the year goes on.  The students keep their Poetry Journals all together in a plastic basket, which I forgot to take a picture of. This makes it easy for the students to quickly get the journal and get to work, instead of having to get it from their desks. 


Another shot of my improved Library. I added another bookshelf and then moved the students' book bins to this spot.
 

Close up of the students' book bins.

In the picture below you can see one child picking a "just right fit" book, and another using the whisper phone to read. 

ABC/ Word Study

Listening Station

Pocket Chart Station

Finally put up the "I Can" list and added a hook for the sentence strips to hang. 

Debbie Diller's Rotation Chart... love this thing. Worth EVERY penny. *Or that's what I tell myself*

 Finally a shot of the Math Work Station Tubs... more to come on these later. 

In writing, our mini-lesson focus is on capitalization. I created a chart with my students in whole group about capitalization and then later went back and made it into an Anchor Chart later. 

Pin It

Tuesday, September 13, 2011

Literacy Work Stations Launch...

I must have had amnesia from last year because I completely forgot how much effort goes into explaining the initial launch of workstations. We have spent the past five weeks of school going over all TEN of our work stations. Since my class grew in size I had to add more work stations. Although the initial explantations can be tiring on a teacher it is WELL worth it for the rest of the school year. For that reason, I do not like to rush the process! I truly wanted my students to know what their expectations are at each station, what they "can" do, and then have them be successful!
Today was our first day at our workstations. At the beginning of the year we only do one rotation a day (until the students are ready for two). Also, it is important to remember to monitor the students during the beginning! This is the time to correct those students who are still confused with what they should be doing at each workstation. Then, *hopefully* my small groups will be able to take place asap. 

Since I was busy monitoring... I apologize for the lack of pictures from today, but here is what I was able to snap...

1. Pocket Chart Station... Students are sorting class names in ABC order using either first or last names. In the younger grades, including the student pictures really helps! 
*I guess these littles decided to sort on the floor first*

Here is how it looks after they sort the names...

Below is the I can list I created for the Pocket Chart *This I Can list will grow and change as the activities at this workstation change*

2. Computer Workstation... they are currently using the website Starfall. 

3. Listening Workstation *Yes I moved it from it's original position in my room, I told you I have a problem with this, more to come on those changes in another post*

4. Handwriting Workstation... which will be transformed into a writing workstation as my students grow.

5. Buddy Reading... students put on their buddy reading visors (purchased at Hobby Lobby in a six pack), they sit in the EEKK position and then read!

Thanks to Ms. Thomas' suggestion, I put the buddy reading books in these bags (there is another below). She also created the directions to go in the front pocket of the bags. 

6. ABC/ Word Study... students sit by the Reading Focus Wall or the "Main Stage" and make their spelling words using magnetic letters. *This workstation will grow A LOT over the school year*

This is what the "Main Stage" looks like currently.

The I Can List I created for the students to use...

6. Big Book Station... Students use pointers to point to the words and read.

7. Classroom Library

Since I was unable to take pictures of all of the workstations I will try again and post tomorrow!


Pin It

Wednesday, September 7, 2011

Wishful Wednesdays..

As I sit here at home trying to scratch off items on my ever growing to do list all I can see is mini piles of teacher goods, EVERYWHERE. My poor living room is currently overtaken by my teacher life.

 Currently spread out across the room: laminator, laminating film, sentence strips, markers, test papers, printer, card-stock,  teacher bag, ziplock bags, teacher books... Seriously, all I can think is how much I would LOVE a beautiful office, organized with my OCD categorizing skills (Lots of storage), with a large table for all of the craftivites a teacher makes,  ALL devoted to my teaching hobby obsession and styled perfectly by moi. It will be complete with every teaching crafty necessity I could possibly think of! Ugh. Wishful thinking! 

Here are a few teacher office inspirations:
  

*Insert Pottery Barn Lust here*
A girl can dream! 

Even though I do not currently have this dream office, I am currently crushing on these teacher tools:

1. This pencil pouch. Honestly, I am obsessed with it. I take it everywhere I go. Three pouches and its small. 
Be honest.. you know you want one.

2. In the Pouch is my Favorite Pens: Fine Tip Flair Pens, Sharp Writer Pencils, White-Out and my new current fav pens to write in my planner... Foray Style-mark Fine Tip Pens. Perfect for writing in small places. 

3. Crayola Poster Markers. Don't get me wrong, I love my Mr. Sketch Markers but these poster markers are awesome! They are perfect for writing on chart paper and creating adorable anchor charts! Plus, the colors are so vibrant on paper. Love. 

4. Personalized Notebook from CVS (probably one of my favorite stores. Kid you not. I love me some ExtraCare Bucks). 

5. My Laminator and Card-stock

6. Clipboard with storage. Need I say more?

7. Paper Pro Stapler (Ms. T introduce me this this bad boy. Best stapler to use in the classroom!)

8. My gorgeous new teacher planner thanks to Erin Condren. Officially obsessed. It is definitely pricey, but worth the money. Well, at least to me. 

What are you currently wishing for?

Happy Wednesday!
Pin It